Hanging photo frames is a balancing act of spacing, colour and proportion. The way your photos are displayed is important and really transformative when done right. Your walls at home should shine proudly with your most cherished moments. This blog is ideas for you, from me, a Maitland Photographer hanging frames at home.
Once your portraits are collected it is an exciting time to get your space ready so you can admire them on display in your own home. Or if you still are debating what to put up and where check out some ideas on my PRODUCTS page.
Location/Size
The best place to hang your family portraits is somewhere you’ll get the greatest enjoyment from it! You want to see them and smile, for them to brighten your day. It can be in an open communal lounge area in your house, a hallway that you walk through everyday, or a small spot beside your bed.
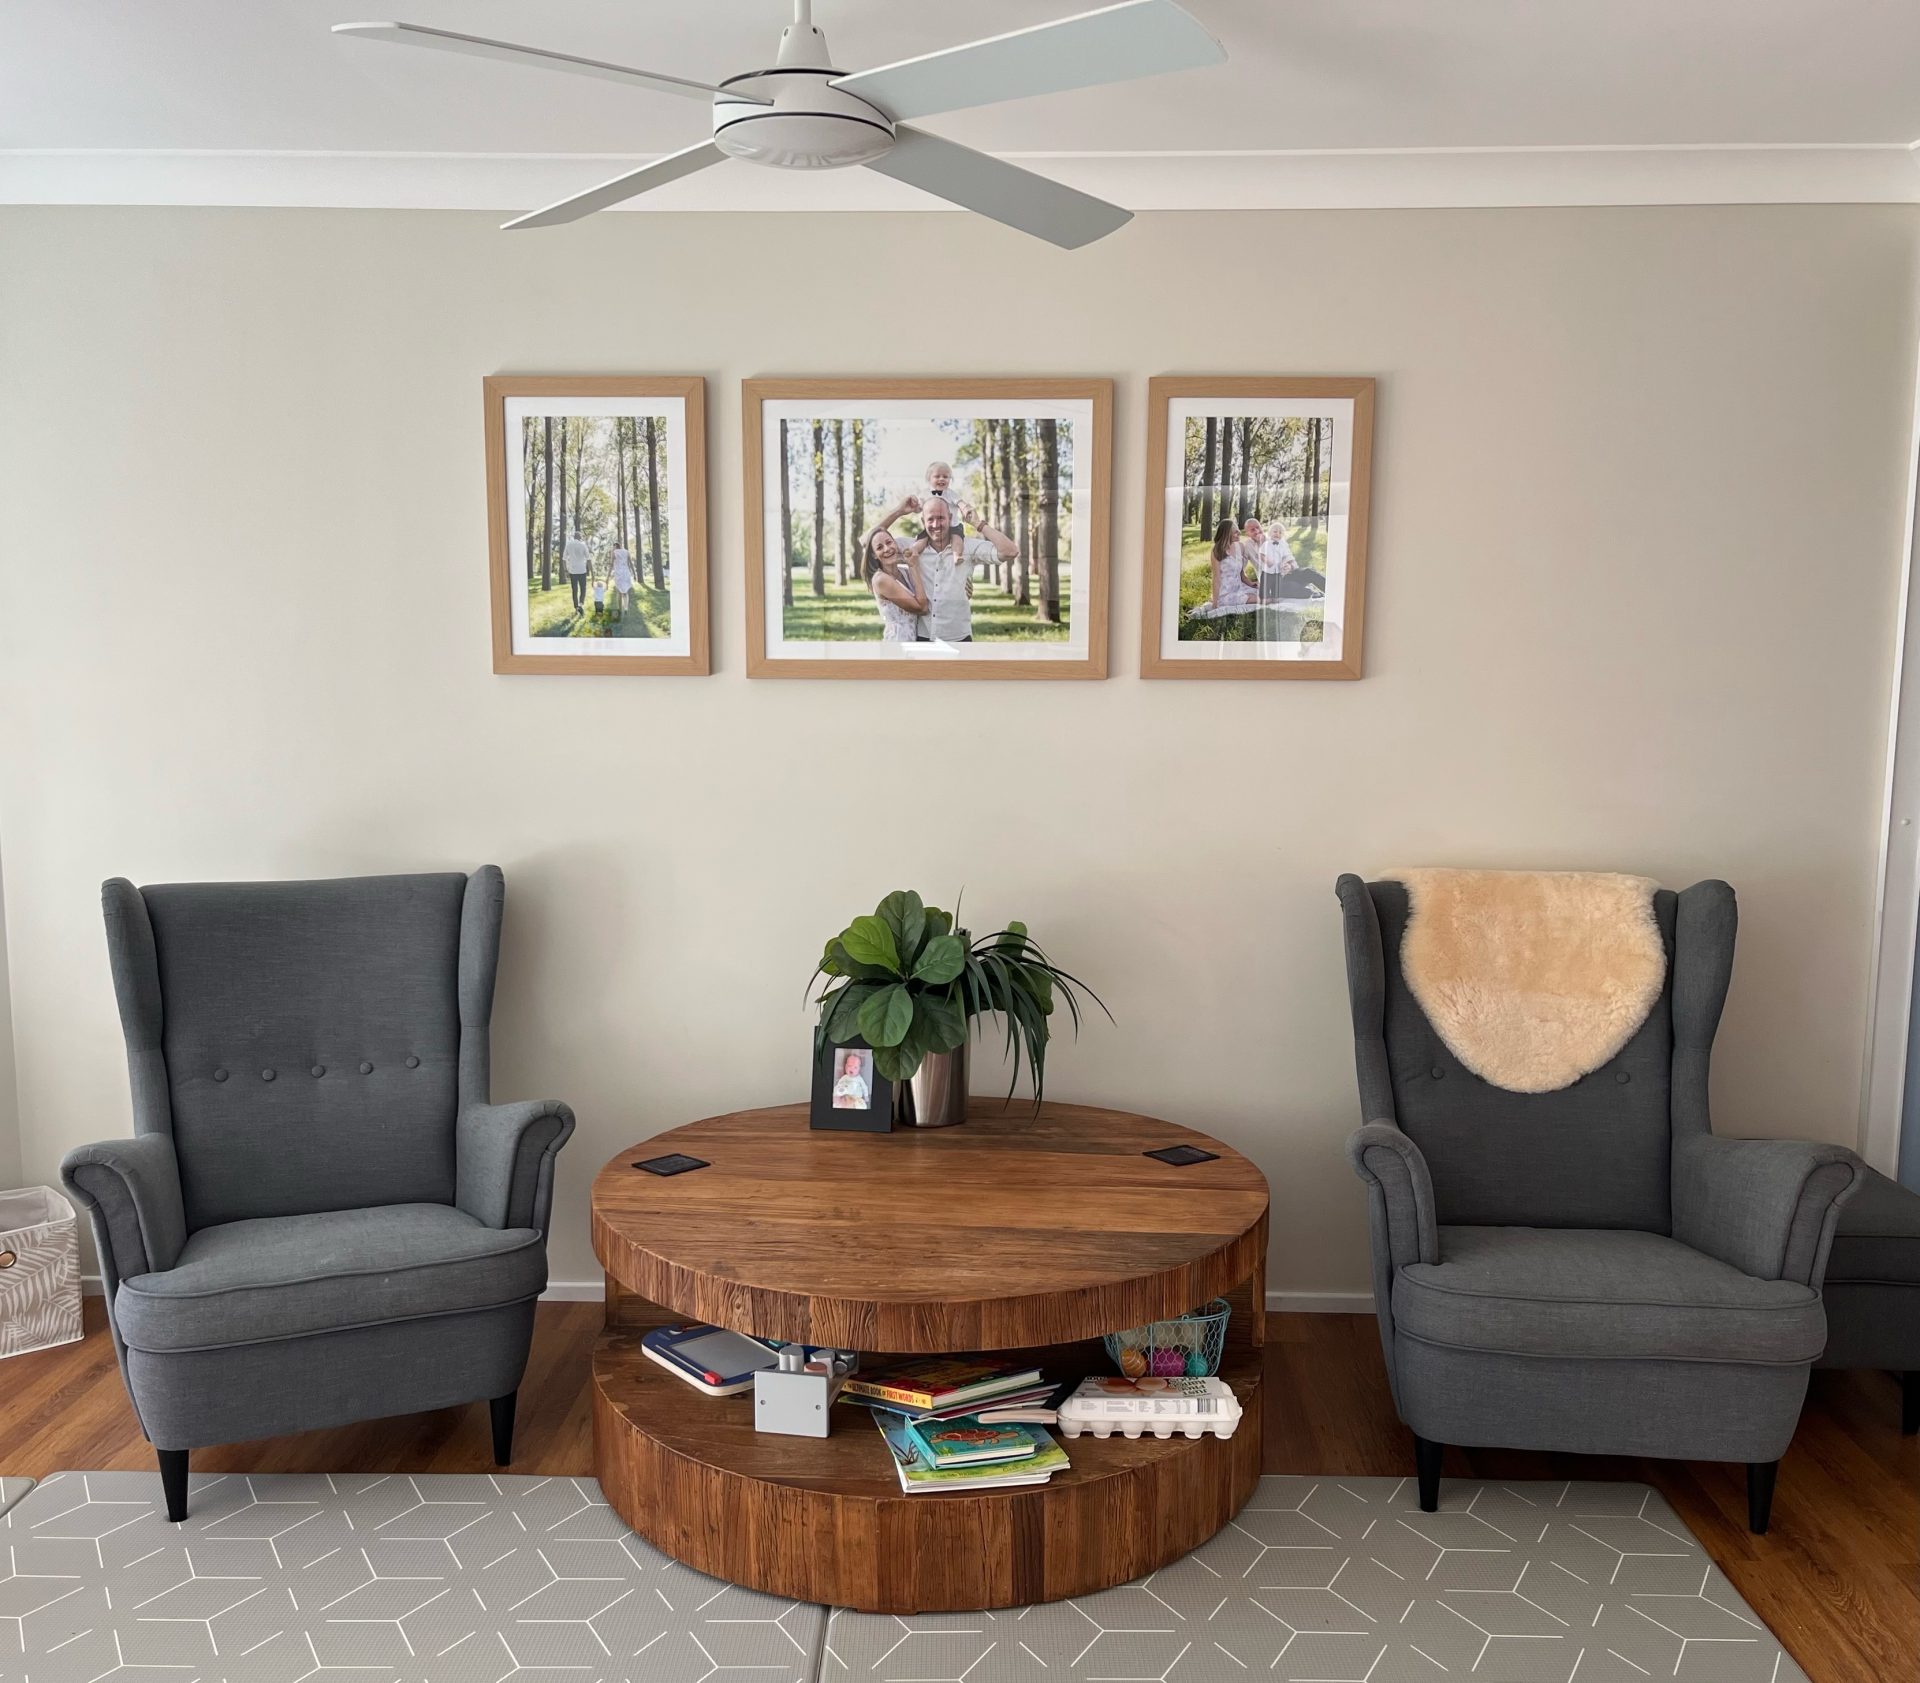
The proportions of your wall and the size of your frame are important considerations to figure out where you photos will look best. Larger portraits can look amazing on a generous blank wall, or create a gallery wall by grouping multiple frames to fill the space.
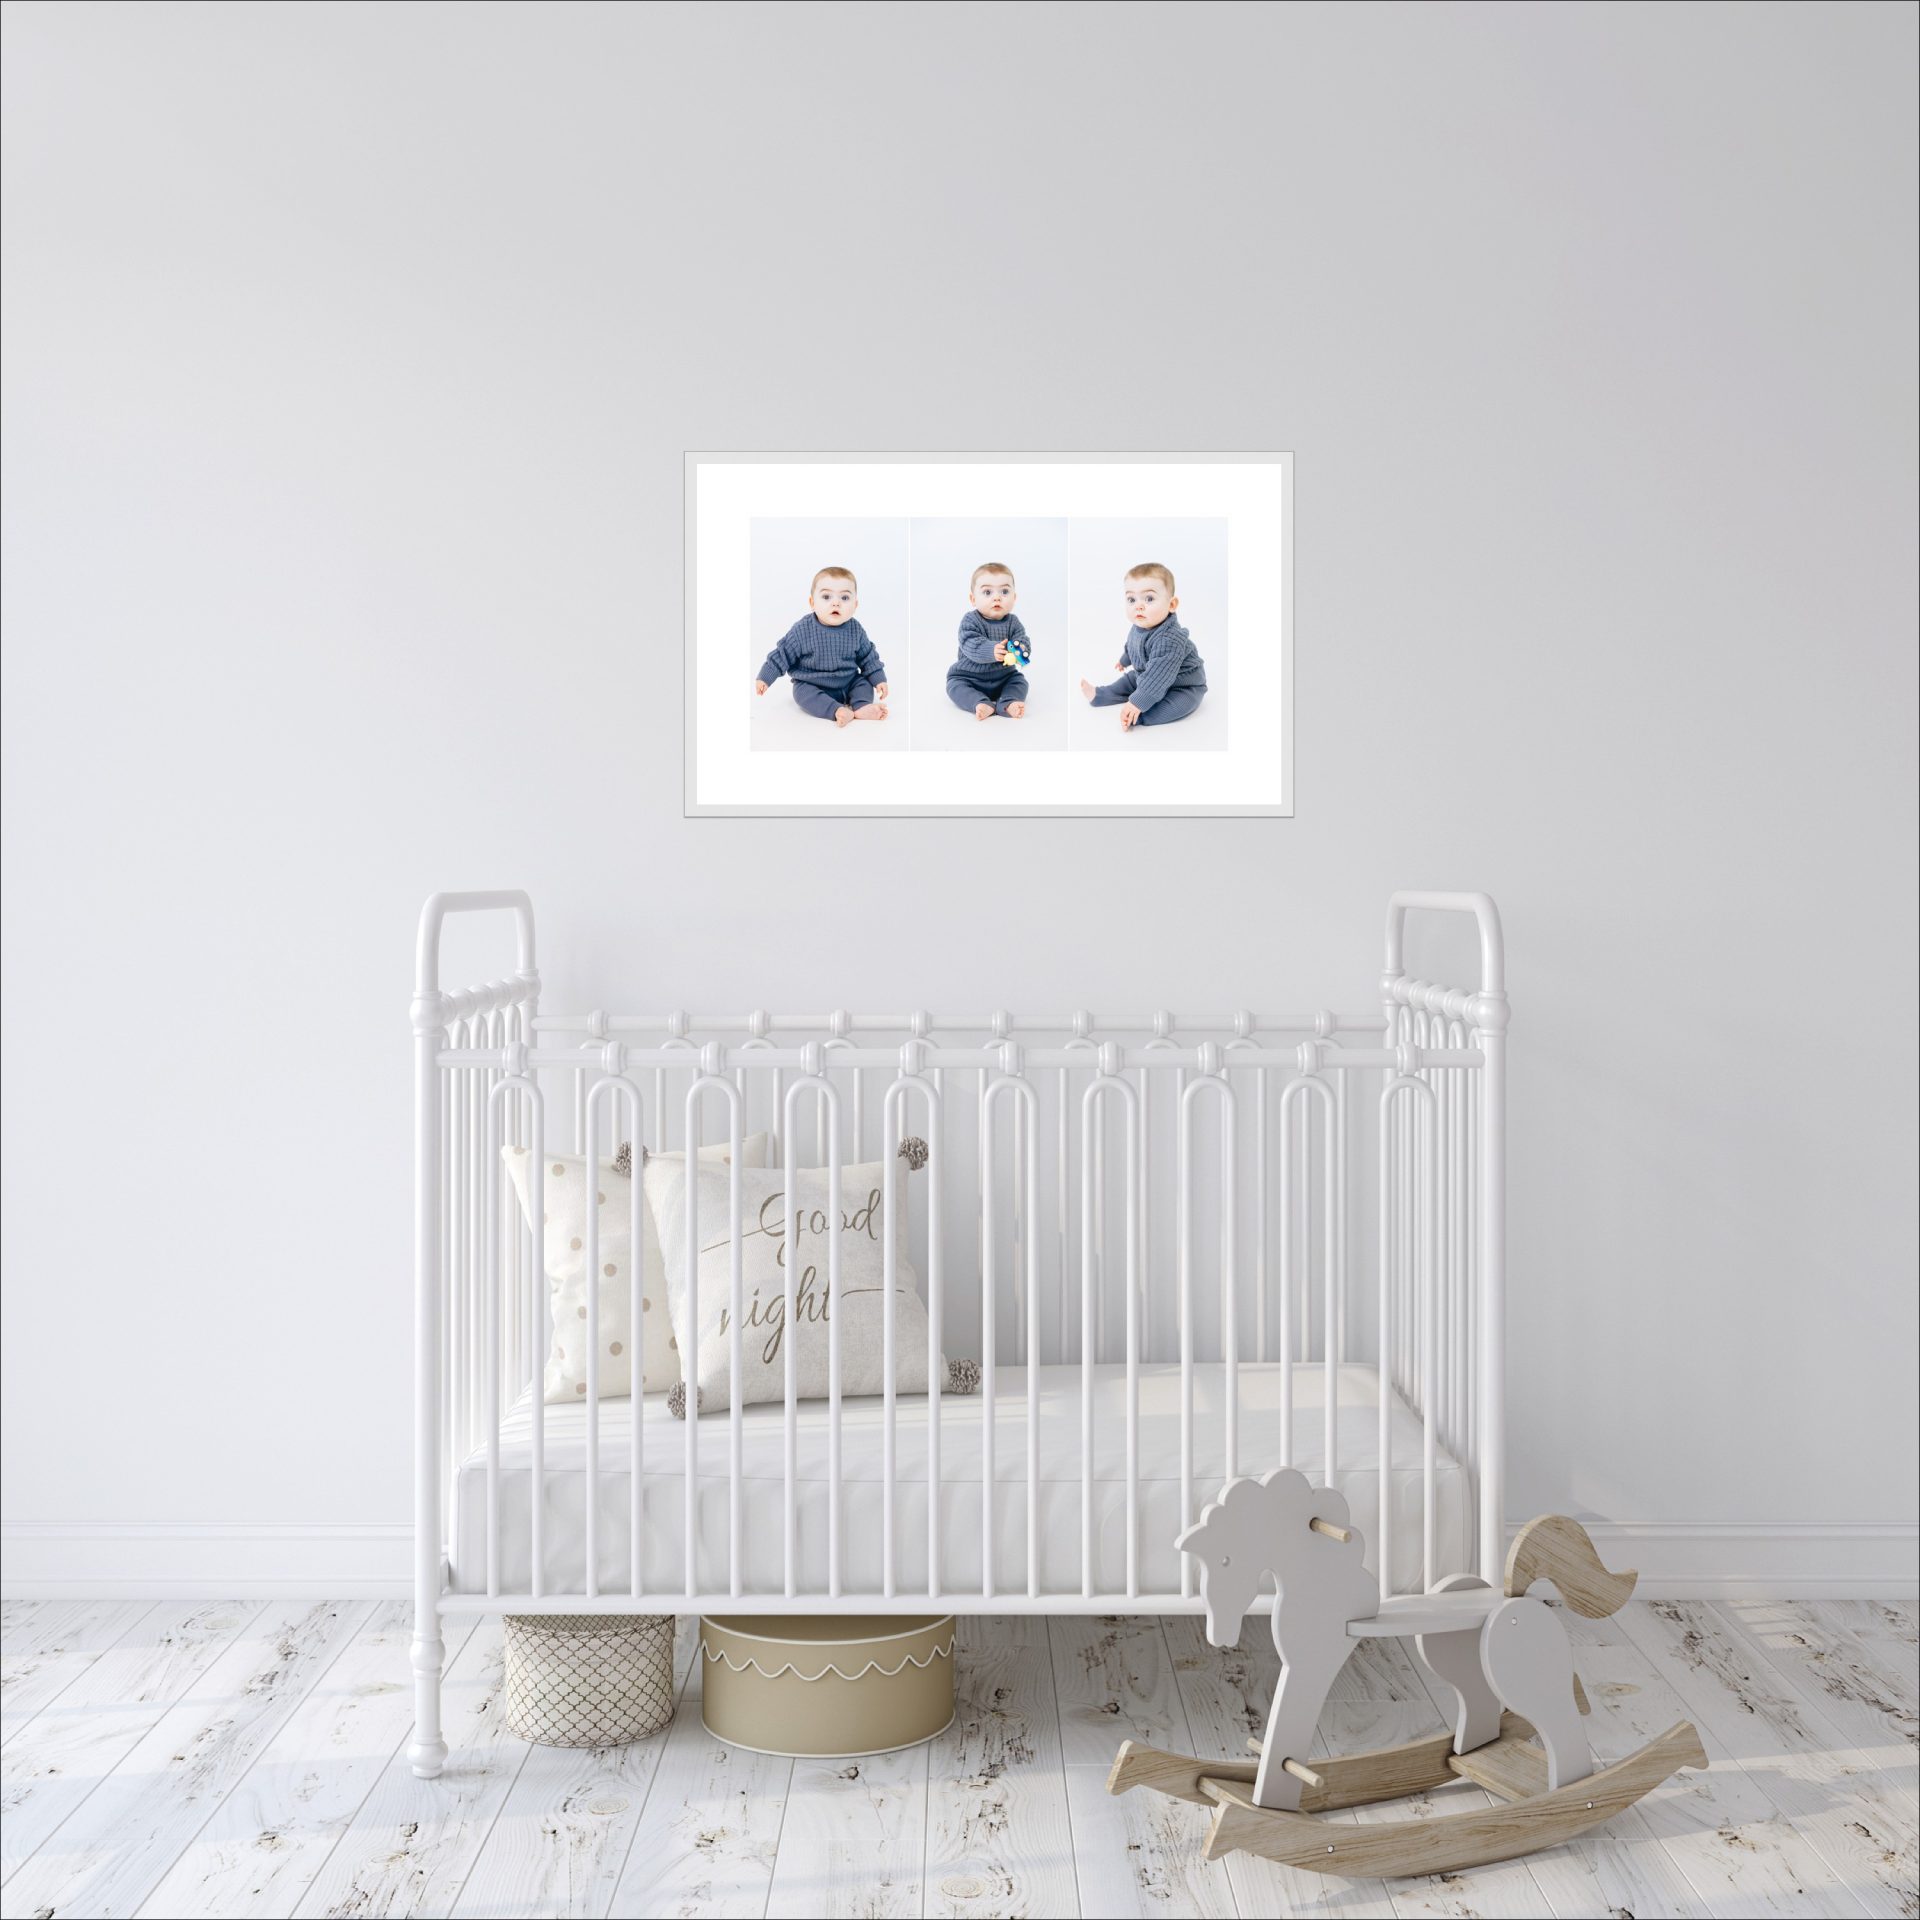
Smaller frames are more suitable in intimate spaces like a hallway or above a desk. In smaller spaces try not to overload with large pictures, keep it simple.
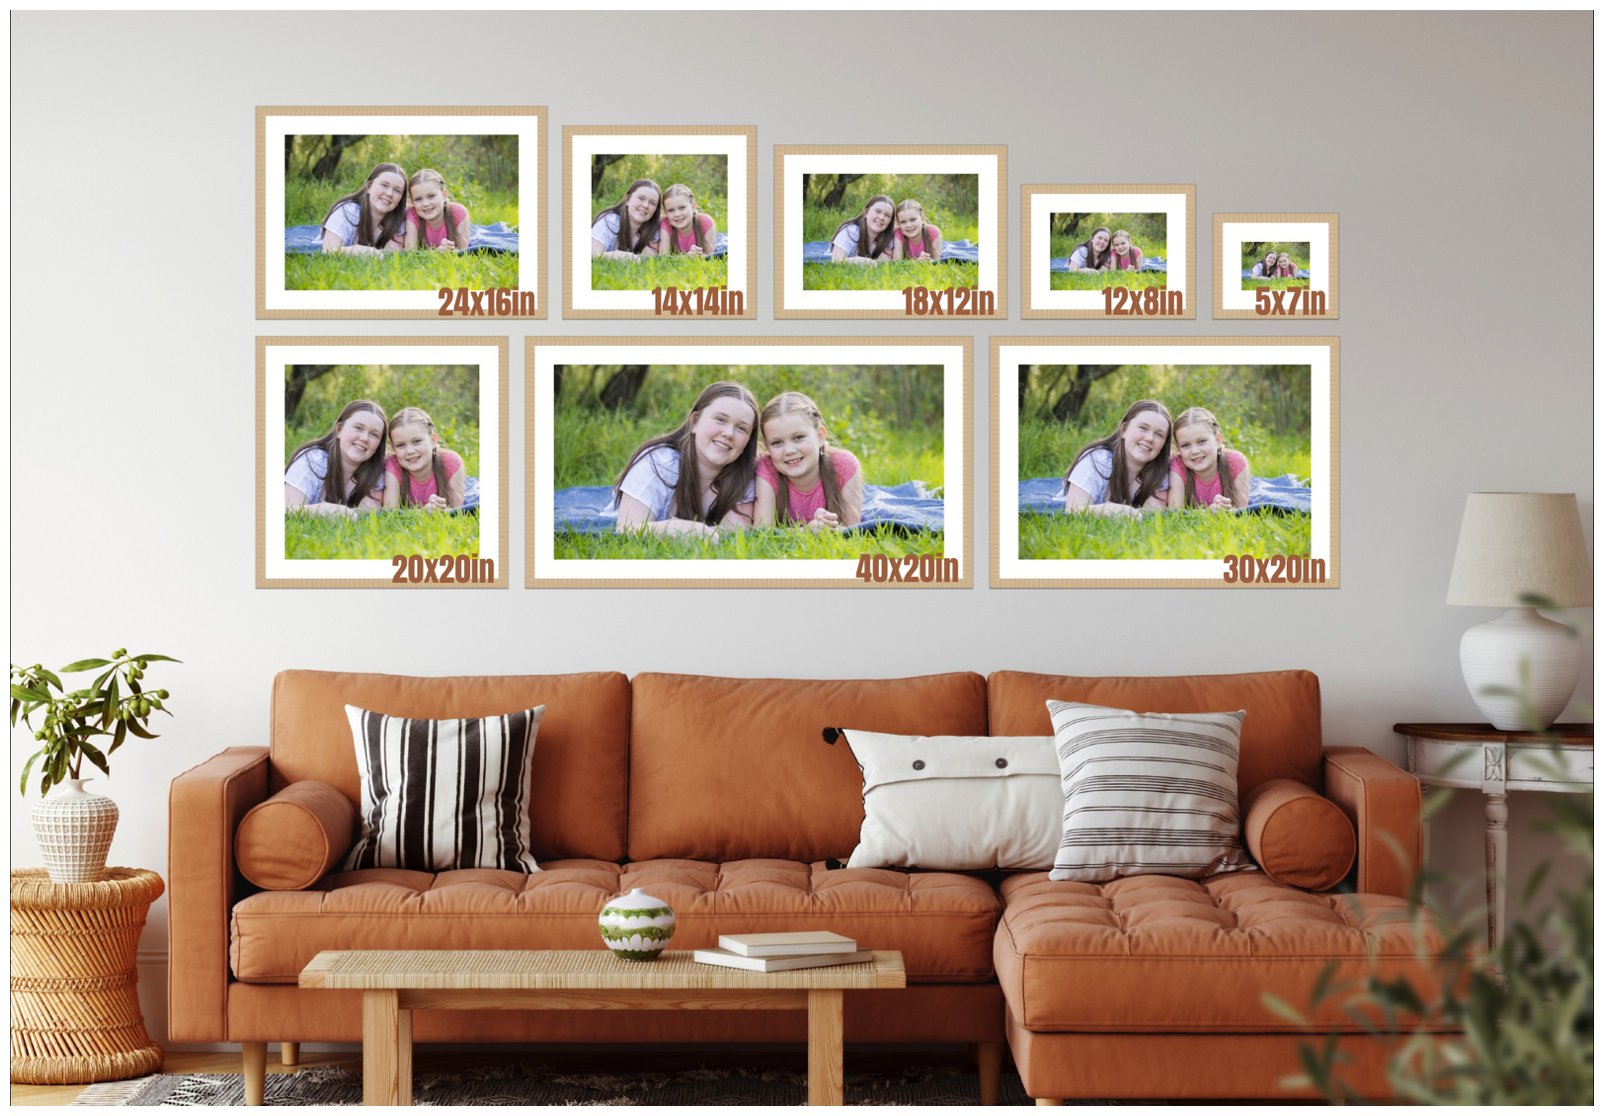
Comparison framed print sizes above.
FIY It is best to keep your frames and canvas out direct sun which can fade your portraits.
Layout
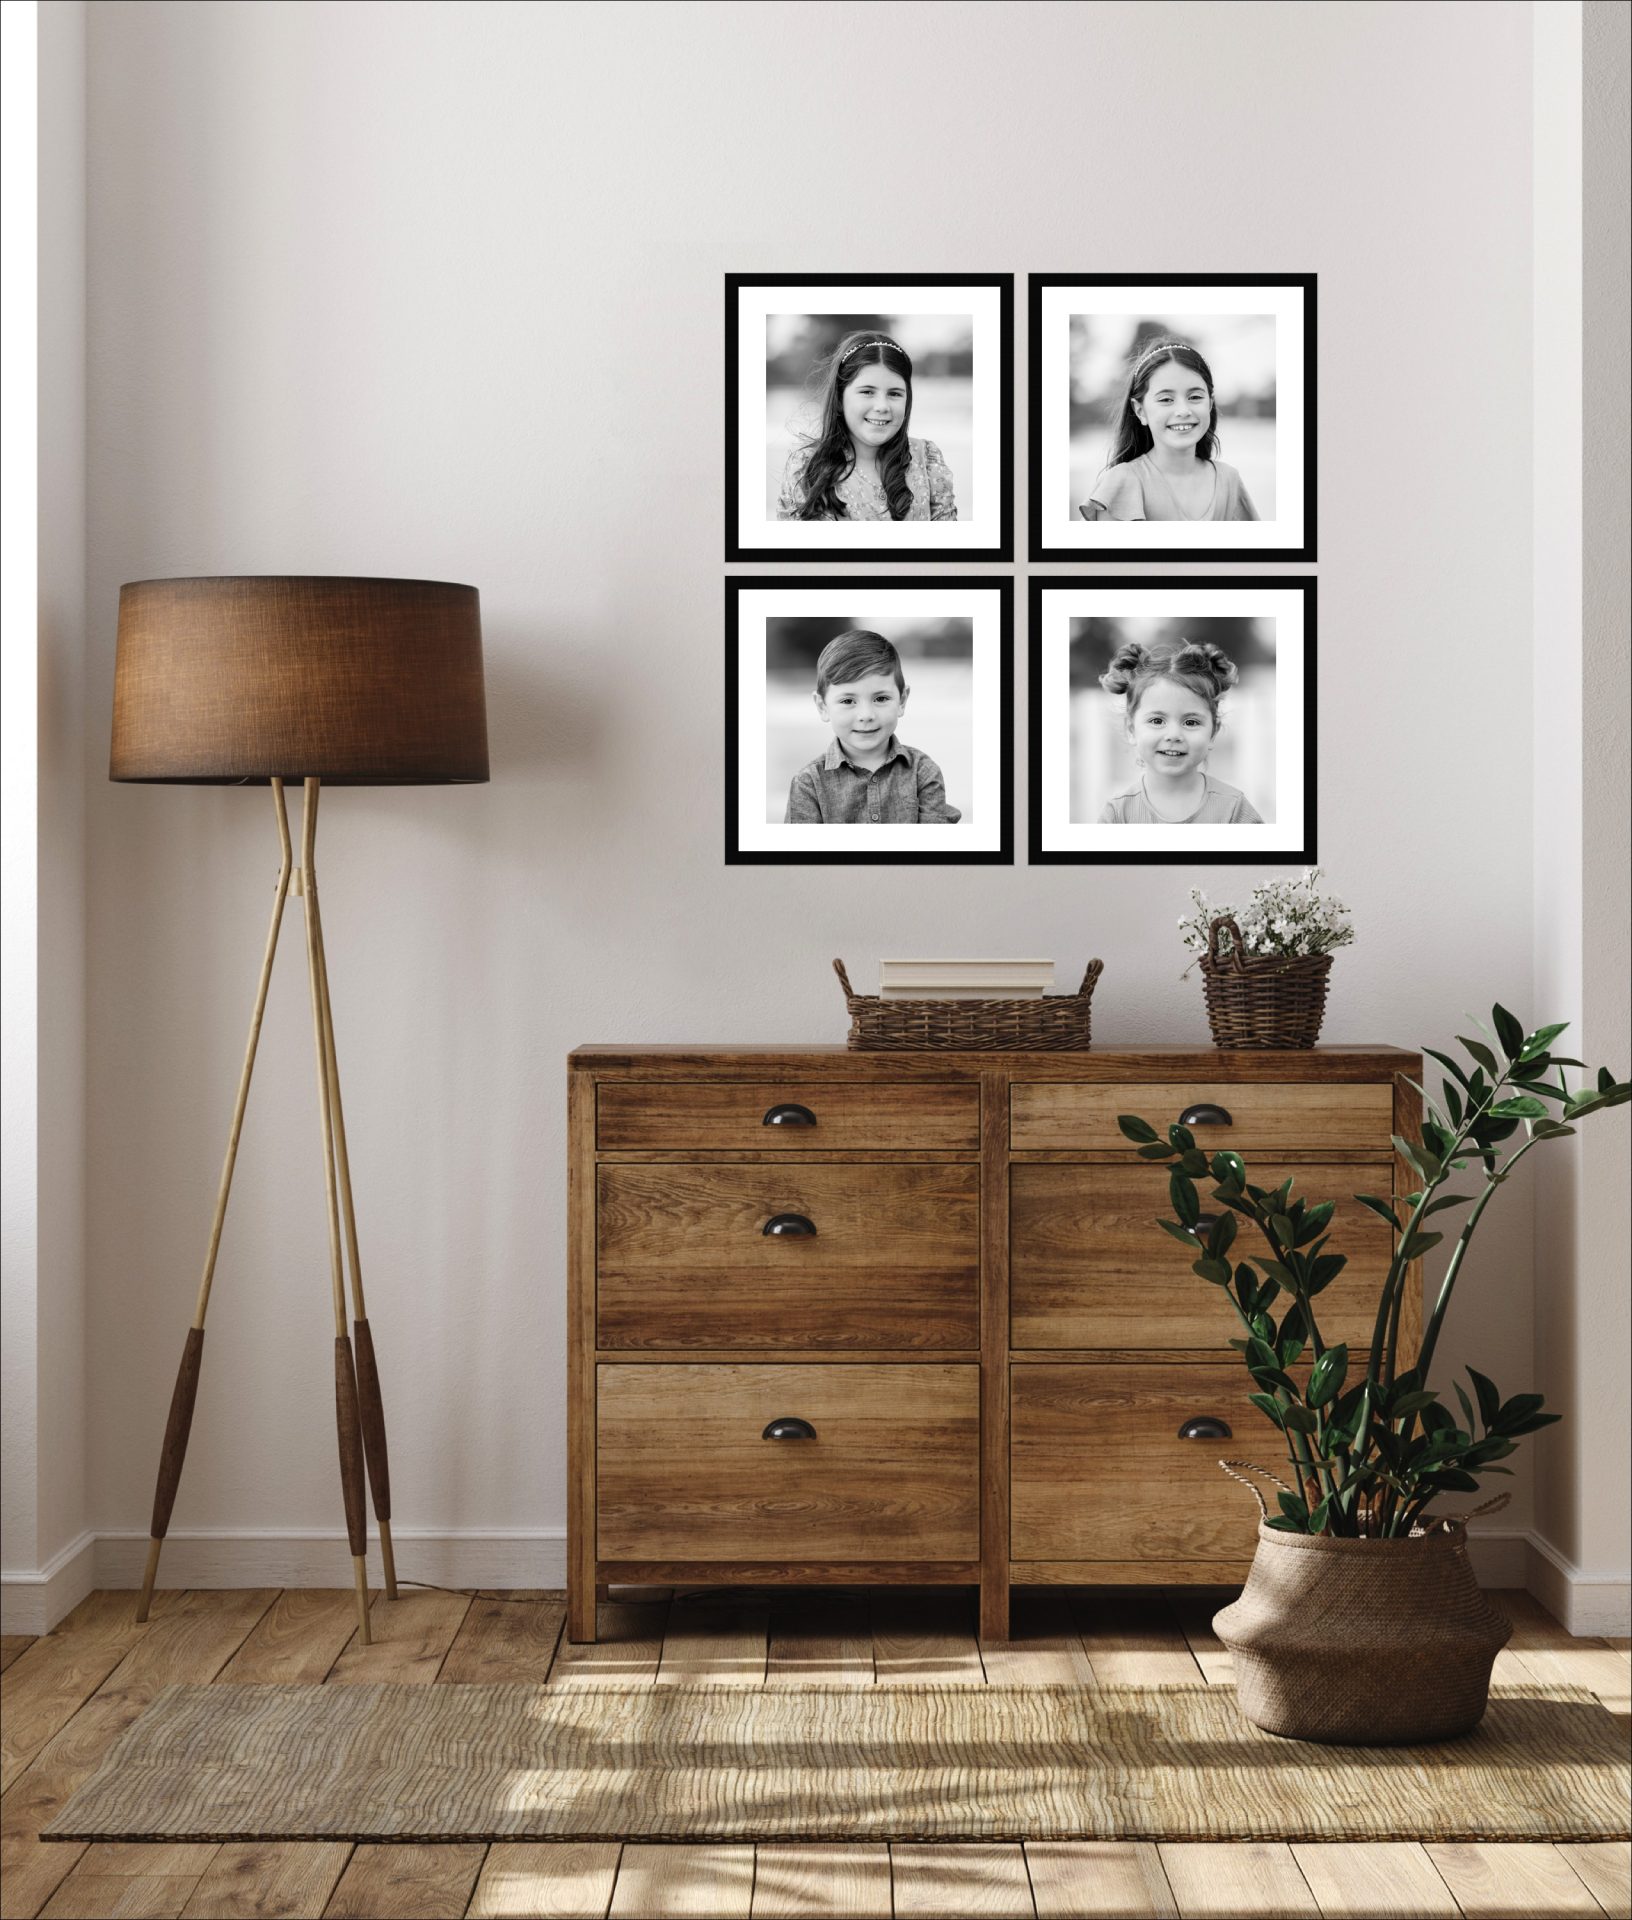
An eclectic mix of photos and art works hung in relaxed style can show off your unique personality in your home. Or you can go for a more unified look with a theme – like all black-and-white photos or all canvas prints. Using one large frame to host a variety of images together can simplify a wall space too.
It is great to use a main favourite image as the starting point and then build around it. To plan your gallery start by mapping it out on the ground first. Use pieces of paper cut to size to design your layout, then play around by sticking them on your wall and moving them around. Use blue tack or masking tape to secure the templates to the wall while you decide on the layout.
Or let me help by sending through a photo of your wall I can put it into my design software to custom design a layout!
(Be sure to measure the distance between how far each frame needs to be apart and record the layout with all your dimensions on a piece of paper to refer too.)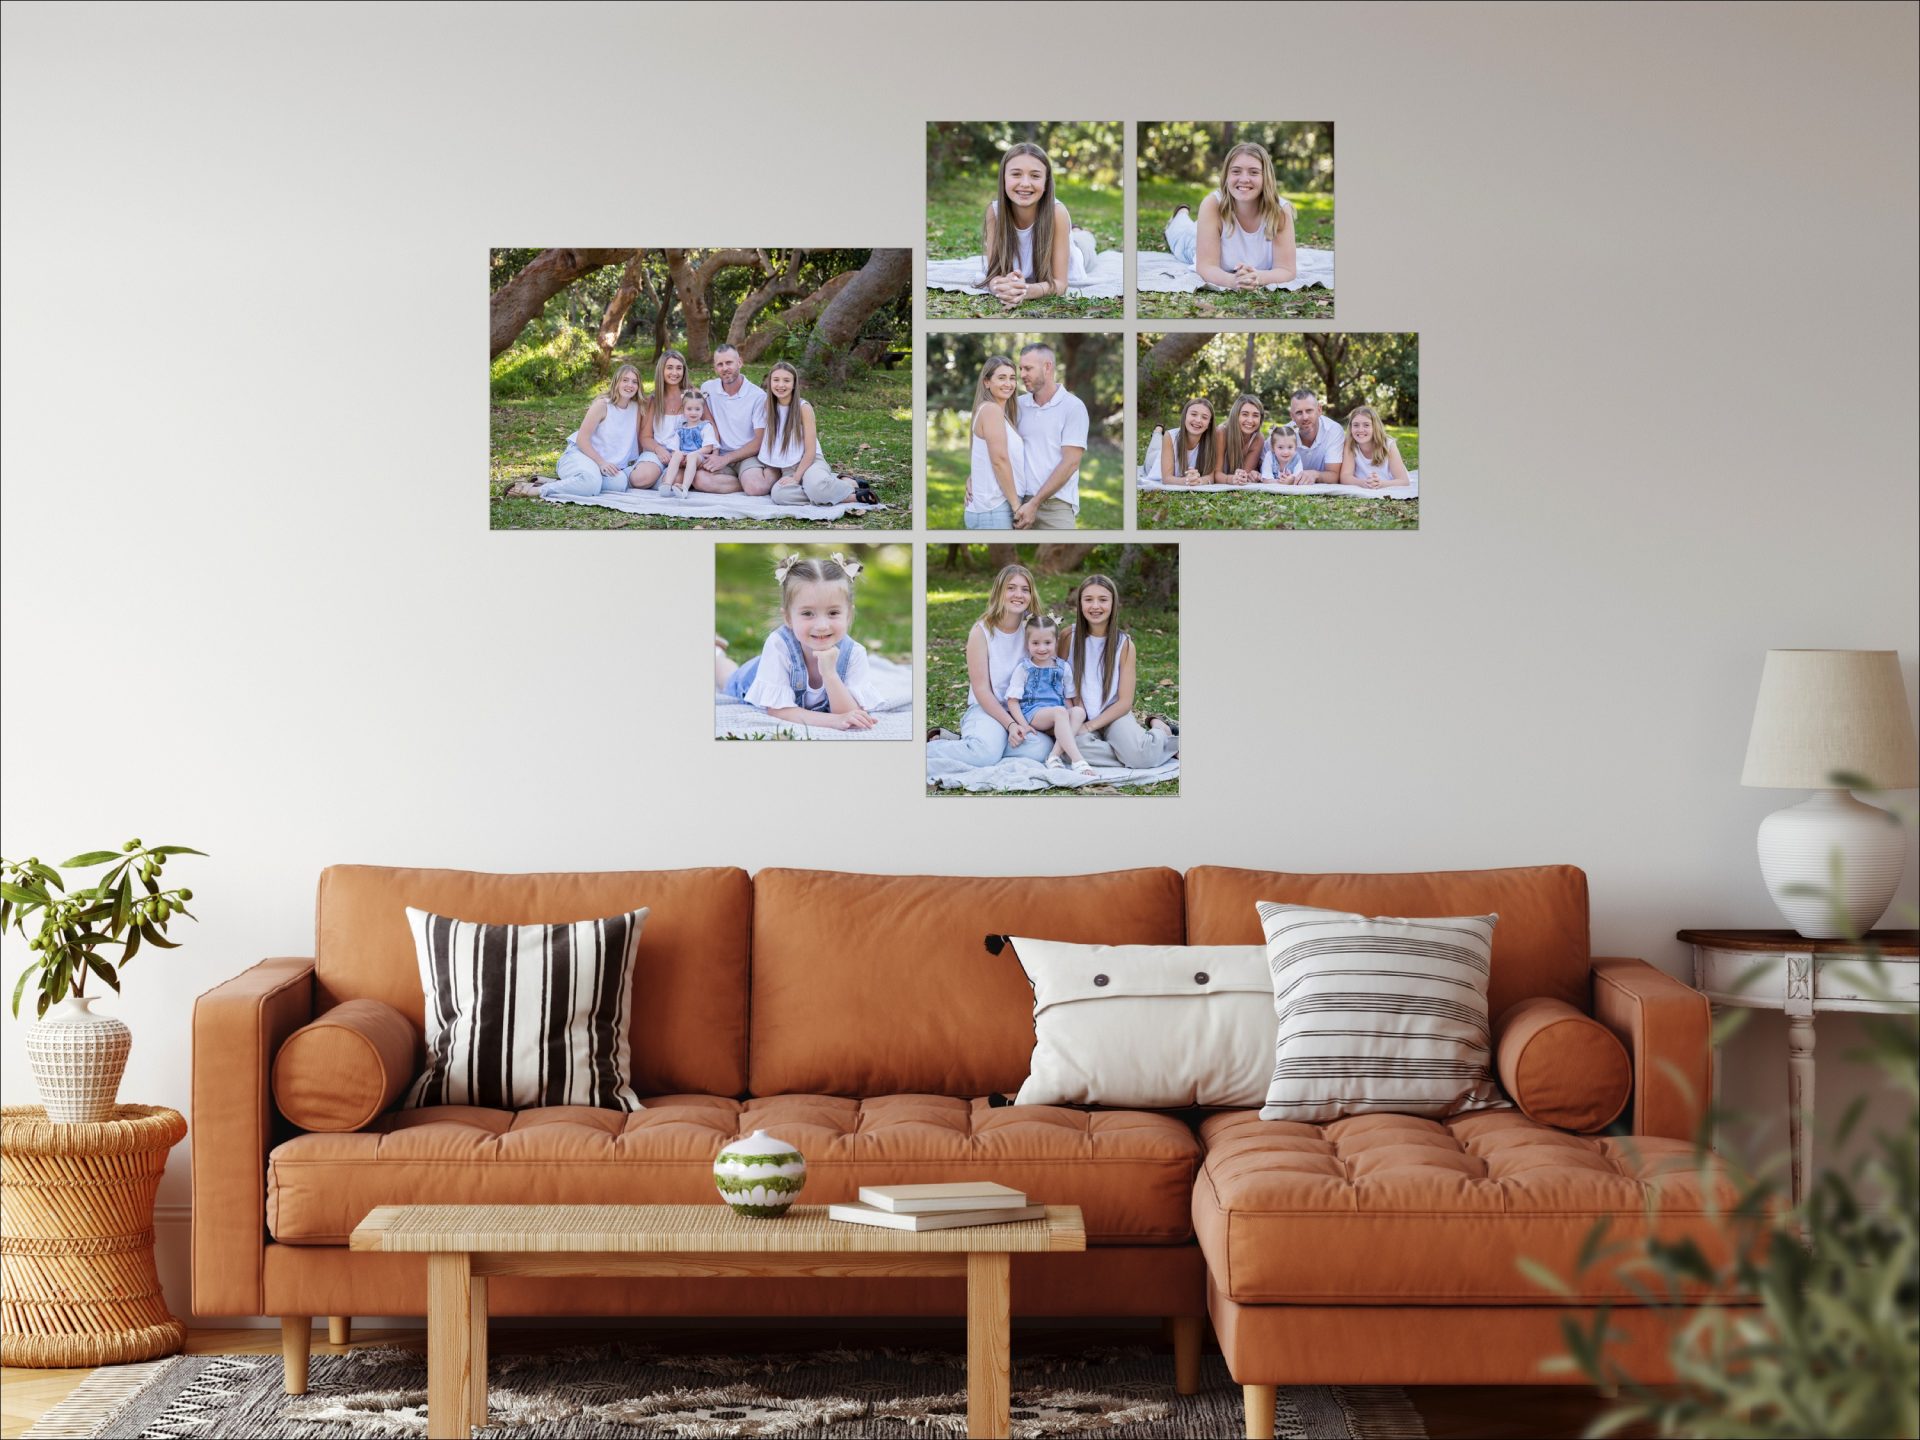
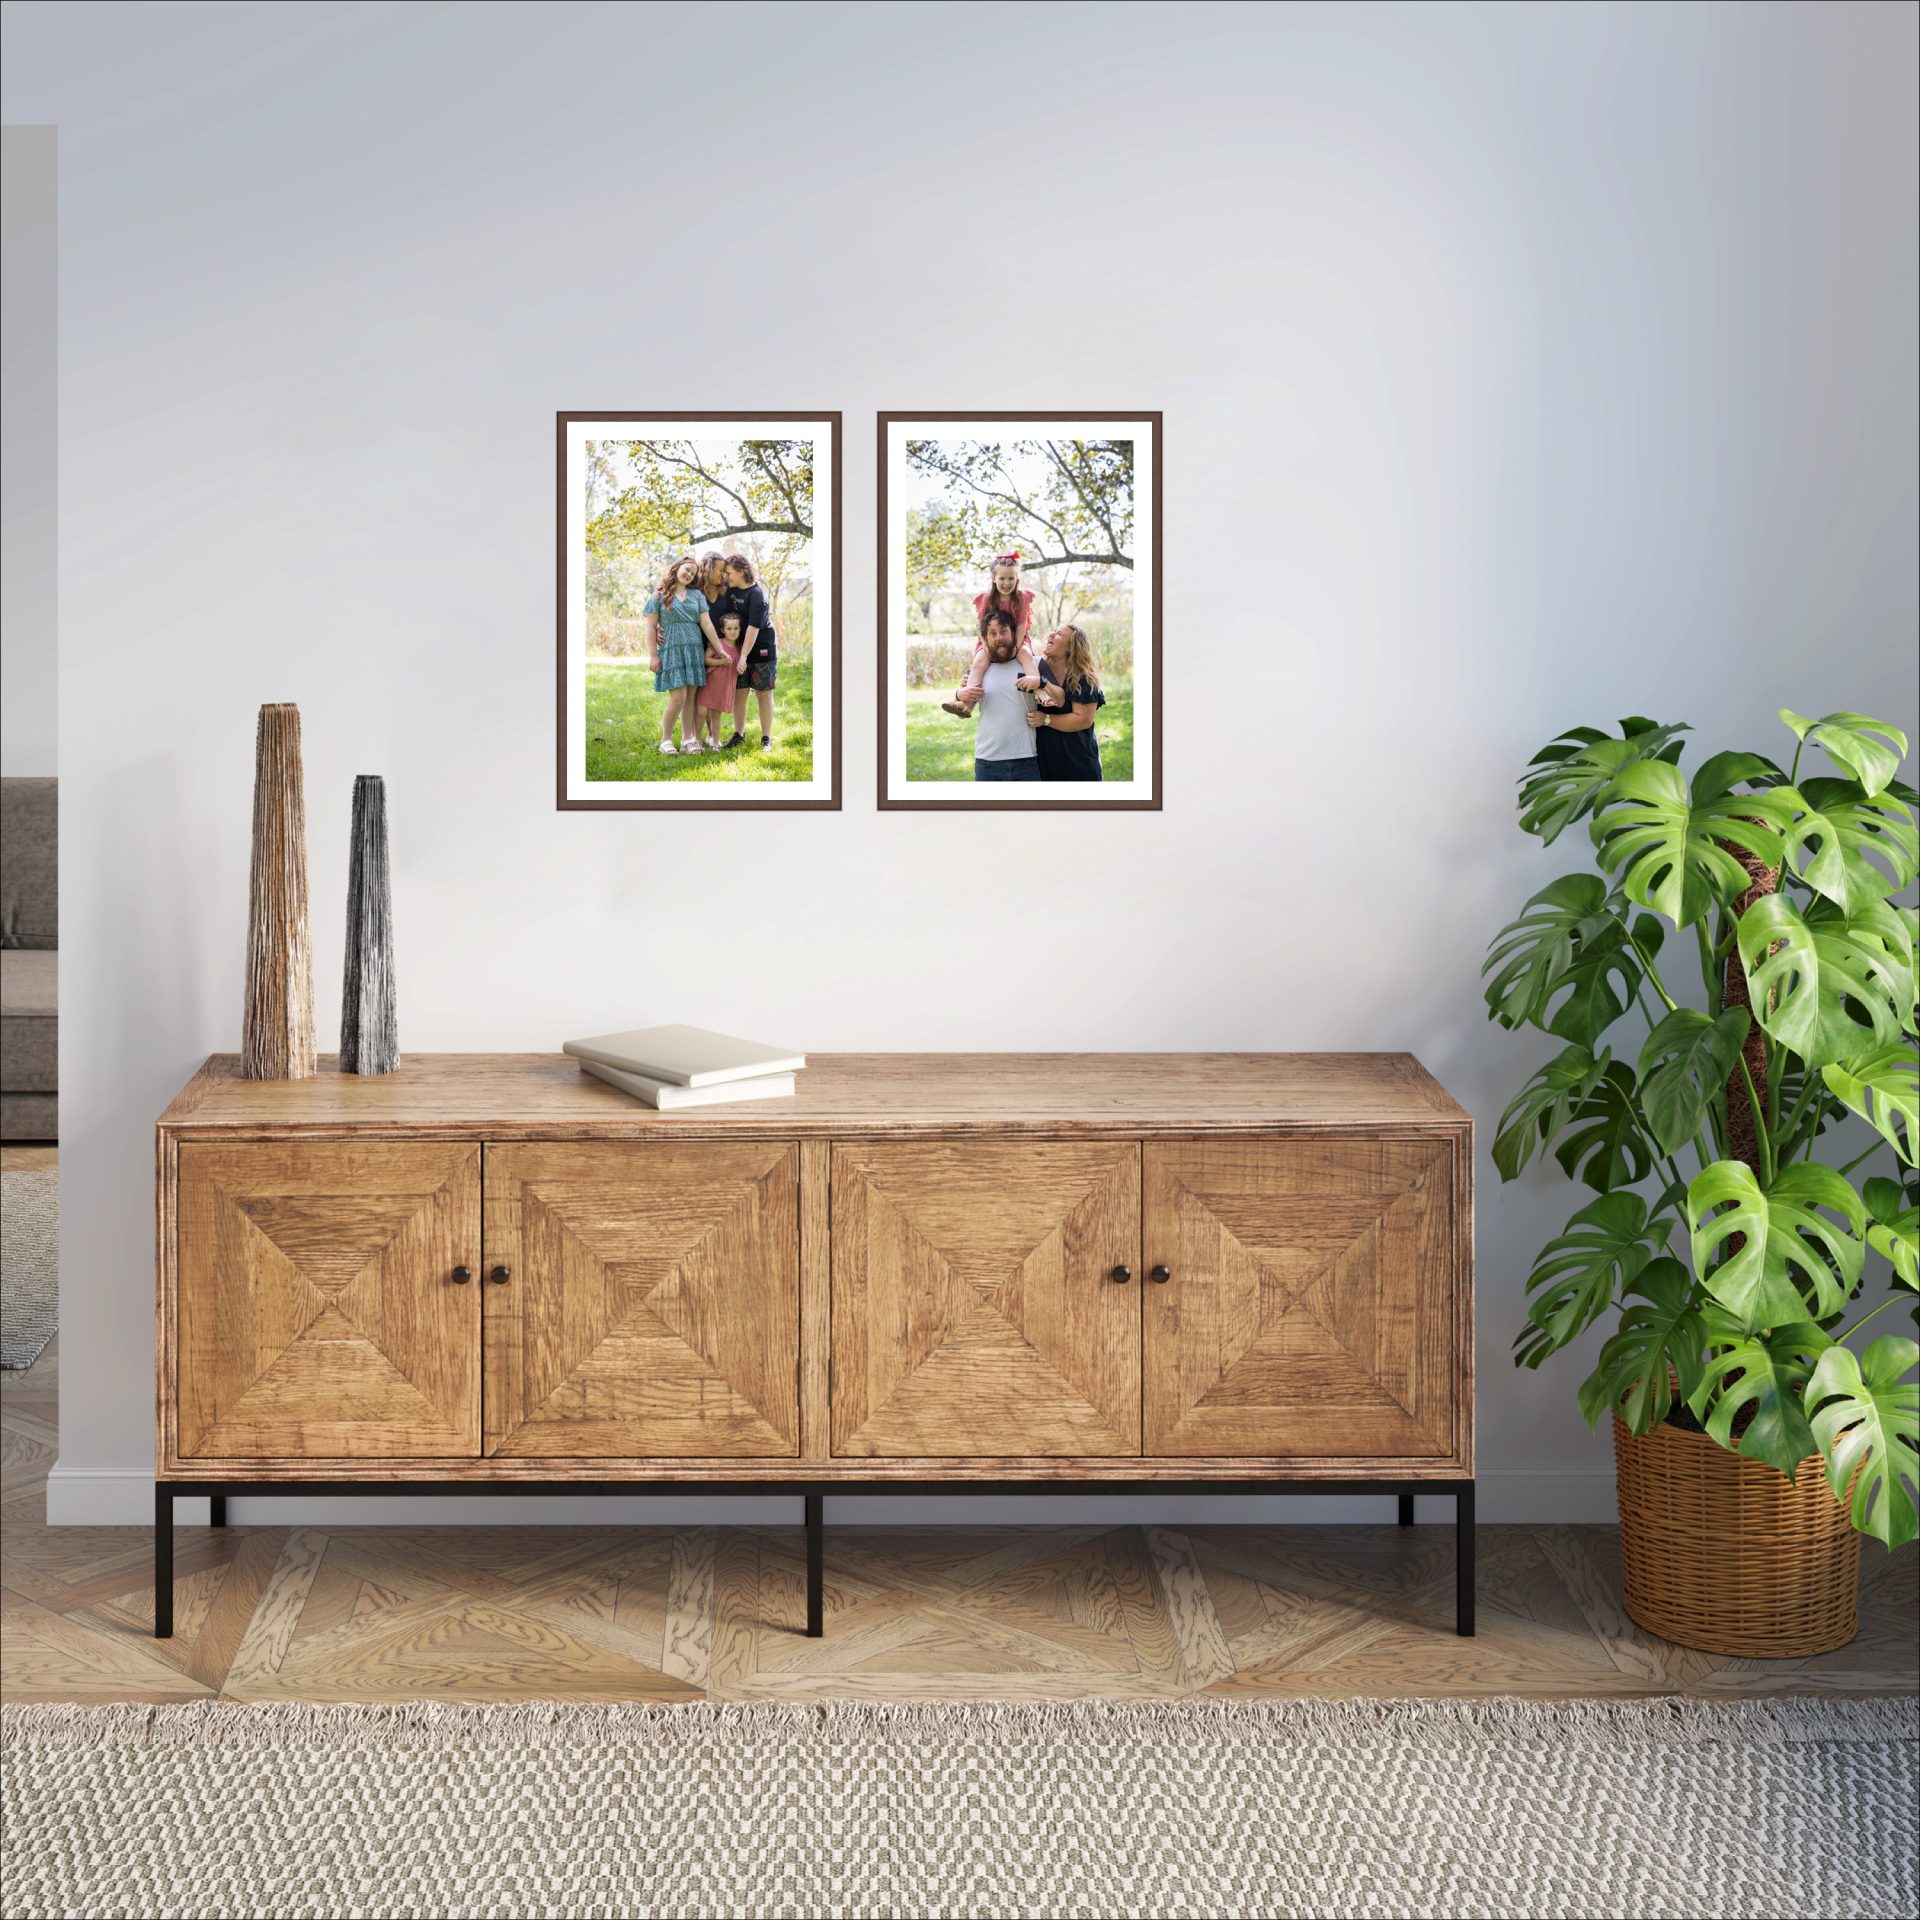
Centering
You don’t necessarily have to hanging your photos in the centre of a wall, rather take cues from your furniture layout. Centring above a lounge suit or side board is often much better. As for height, just over halfway up the wall at eye level is an ideal hanging height for most large frames or layouts, but its also depends on your personal preference.
If hanging above a bed or couch, ensure you don’t leave too much distance between the frame and the furniture. It does depend on the size and layout of the frame, but it is recommended to leave no more or less than 15-20cm between the bottom of the artwork and the furniture. Remember you want frames to remain visually connected to the furniture and room. Don’t leave a big enough gap that your eye is drawn to the wall space between the 2 pieces.
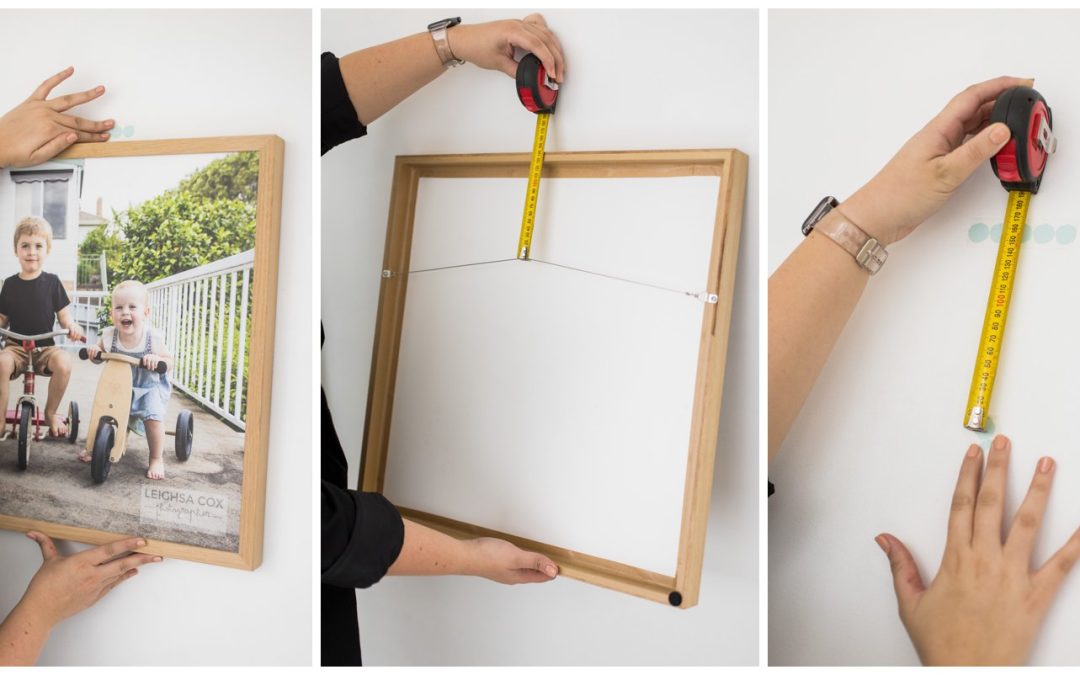
Measuring
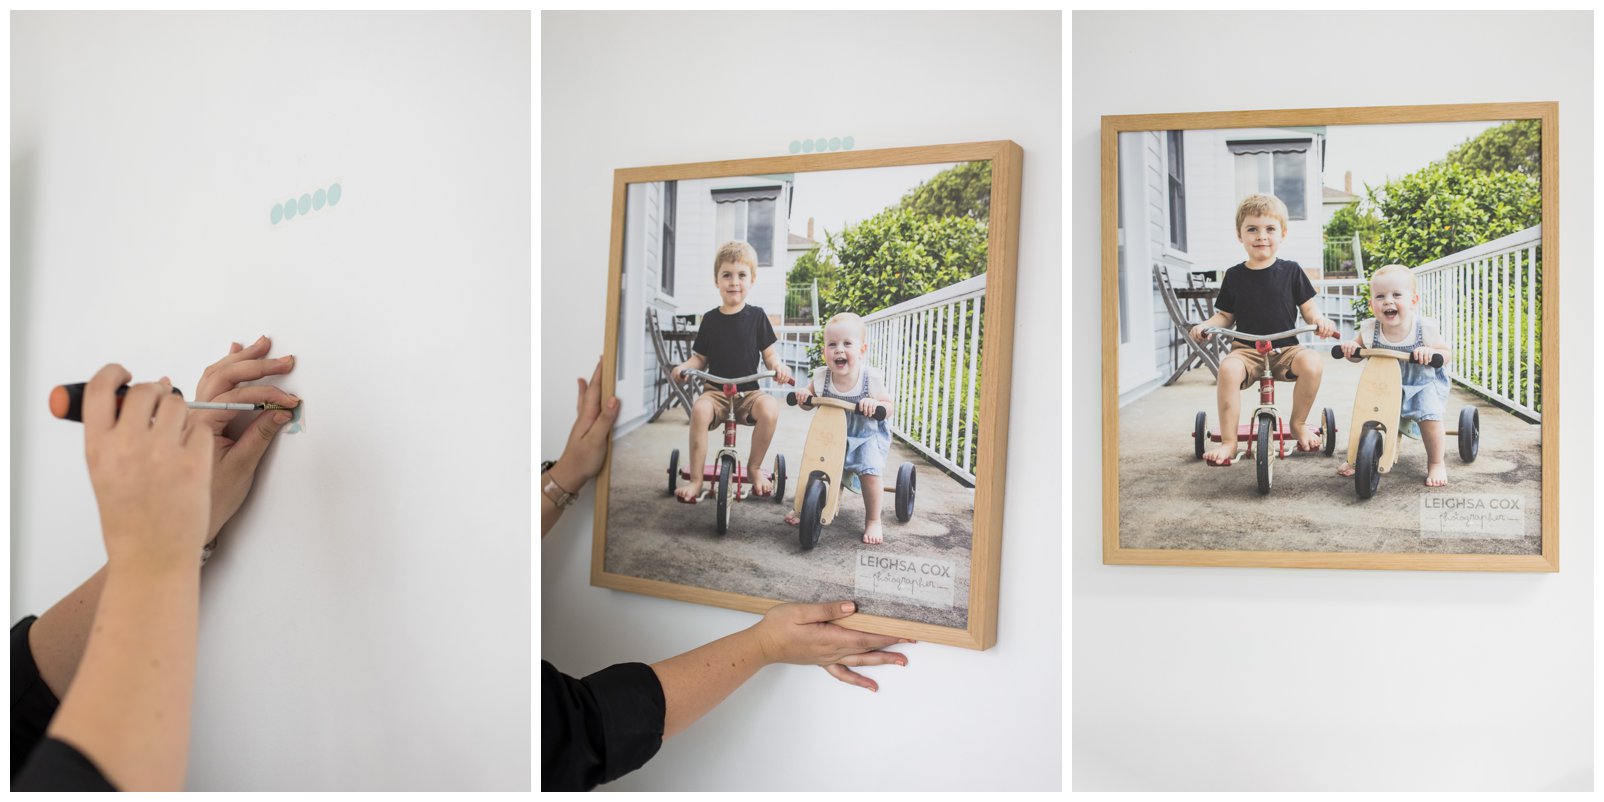
To find the exact point where you need to put your hook into the wall can be frustrating. See below for a few steps to getting it done right.
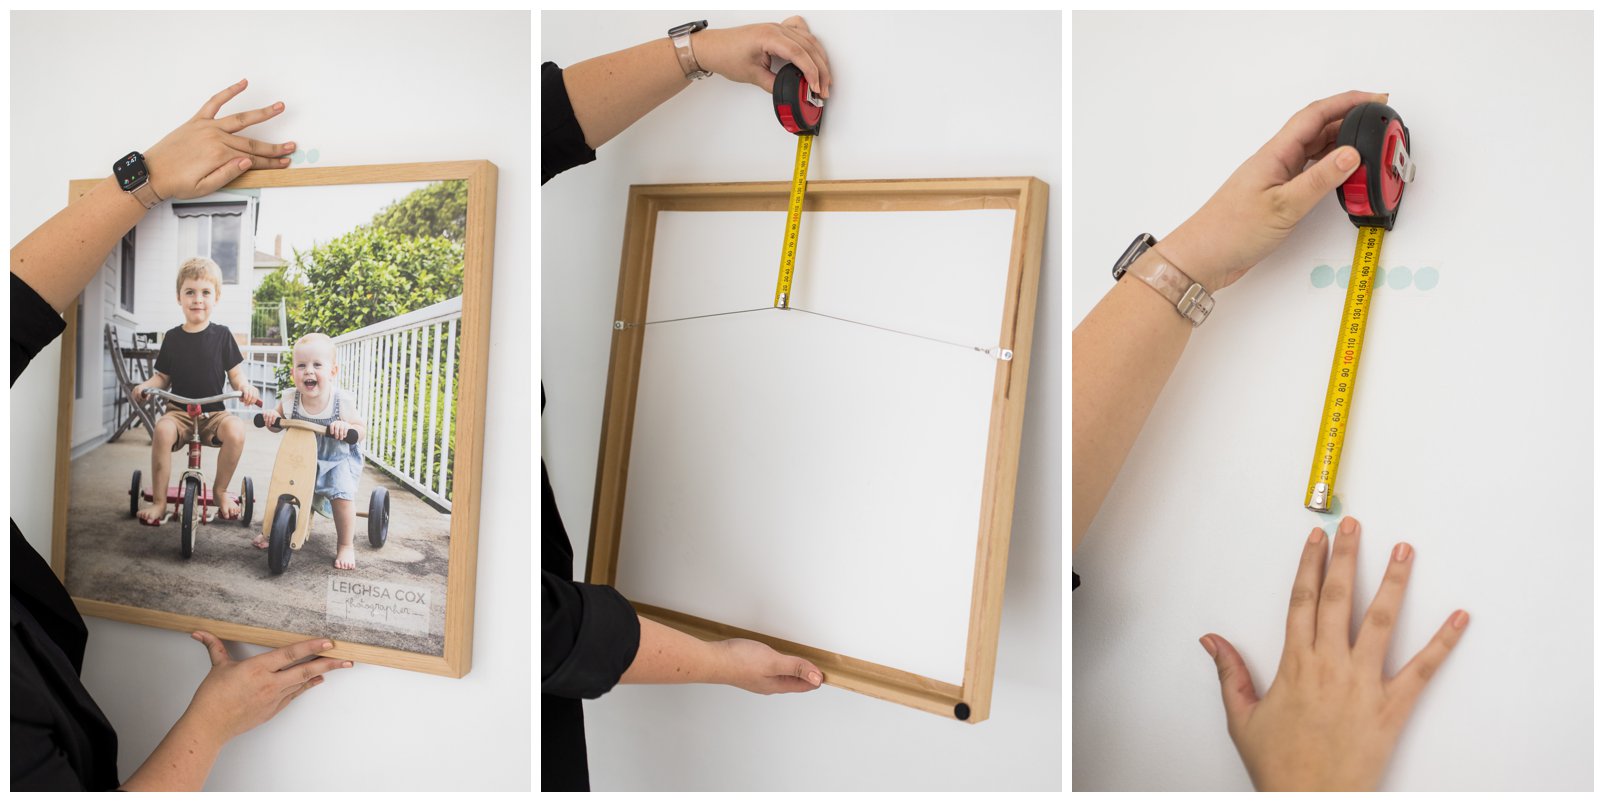
ONE- Hold the frame in position in the ideal hanging spot on the wall. Then put a pencil mark (or a piece of masking tape) at the top of the photo frame, this will show where you want the top edge of the frame to sit. You can put a piece of tape on the bottom of the photo frame too so that when you stand back you can see if the positioning is right for you.
TWO – Measure the hanging distance on the back of the frame. Place your frame face down on a clean flat surface. Then measure the gap between the hanging wire and the top of the picture frame. Hook your measuring tape onto the wire and pull upwards towards the top of the frame (to take up any slack in the wire). Record the measurement.
THREE – Mark the wall hanger location on your wall. Using the measurement from above, position the tape measure at the top of your tape/pencil mark from earlier. This will show the distance of your the hook for the frame will need to go. Then mark this spot on the wall with pencil.
FOUR – Fix your Wall Hook/Nail/screw to the spot you will hang your frame from into the wall. Just make sure you observe any weight limit requirements to the type of hanger you are using to take the weight of your frame. If your frame is large make sure the wall surface is sturdy enough to hold if not you will need to find the stud and centre from there.
FIVE – Hang your frame on the wall screw or hook using the wire cord behind the frame. Just carefully check and make sure that the picture frame is supported securely by the hooks.
SIX – Now just check that your frame is level by taking a few steps back to look at how it is sitting on the wall. You can use your eye to judge or double check using a spirit-level.
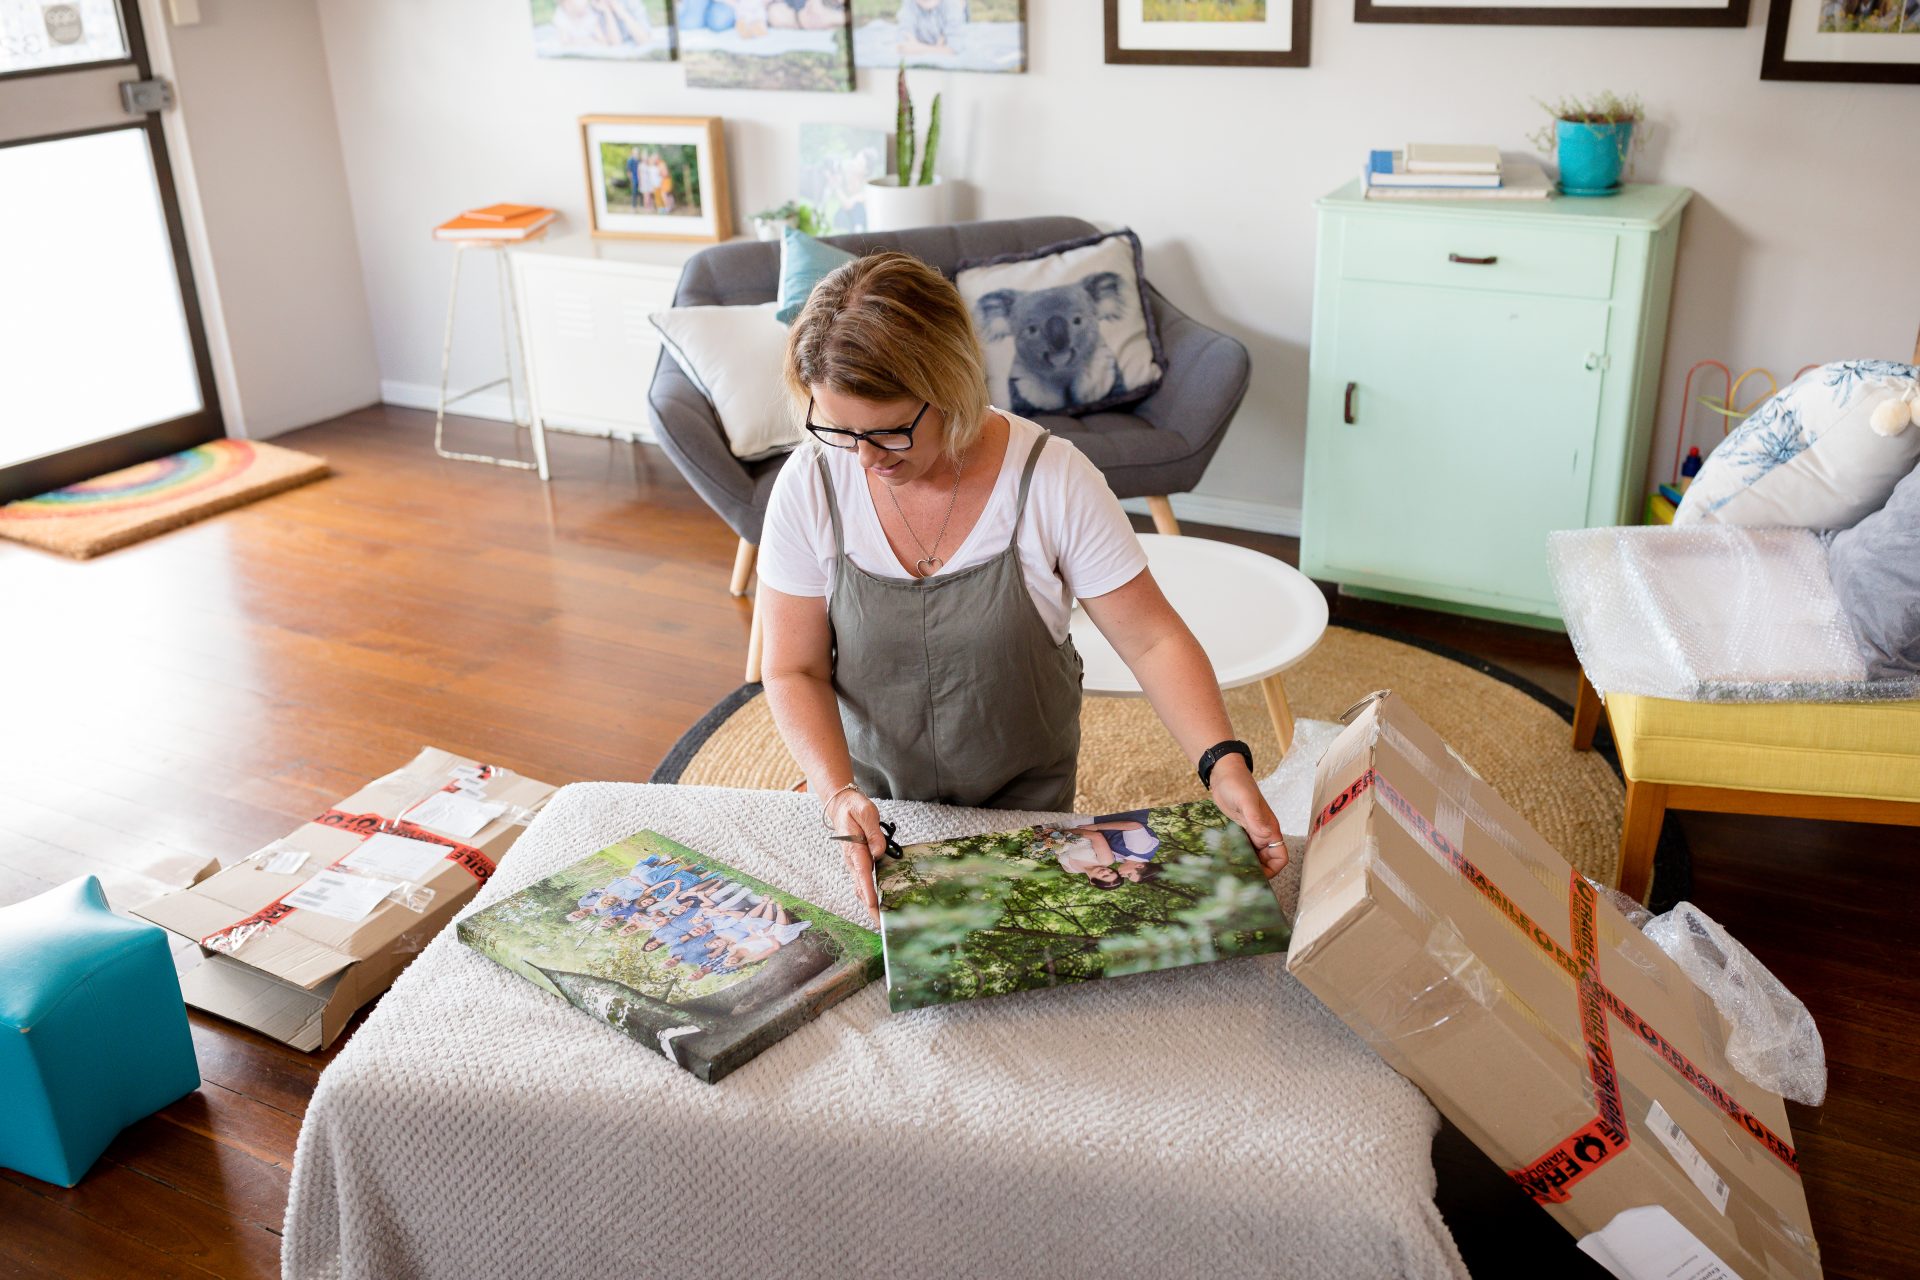
These beautiful photos frames below are waiting to be picked up and then a photo of their final place at home!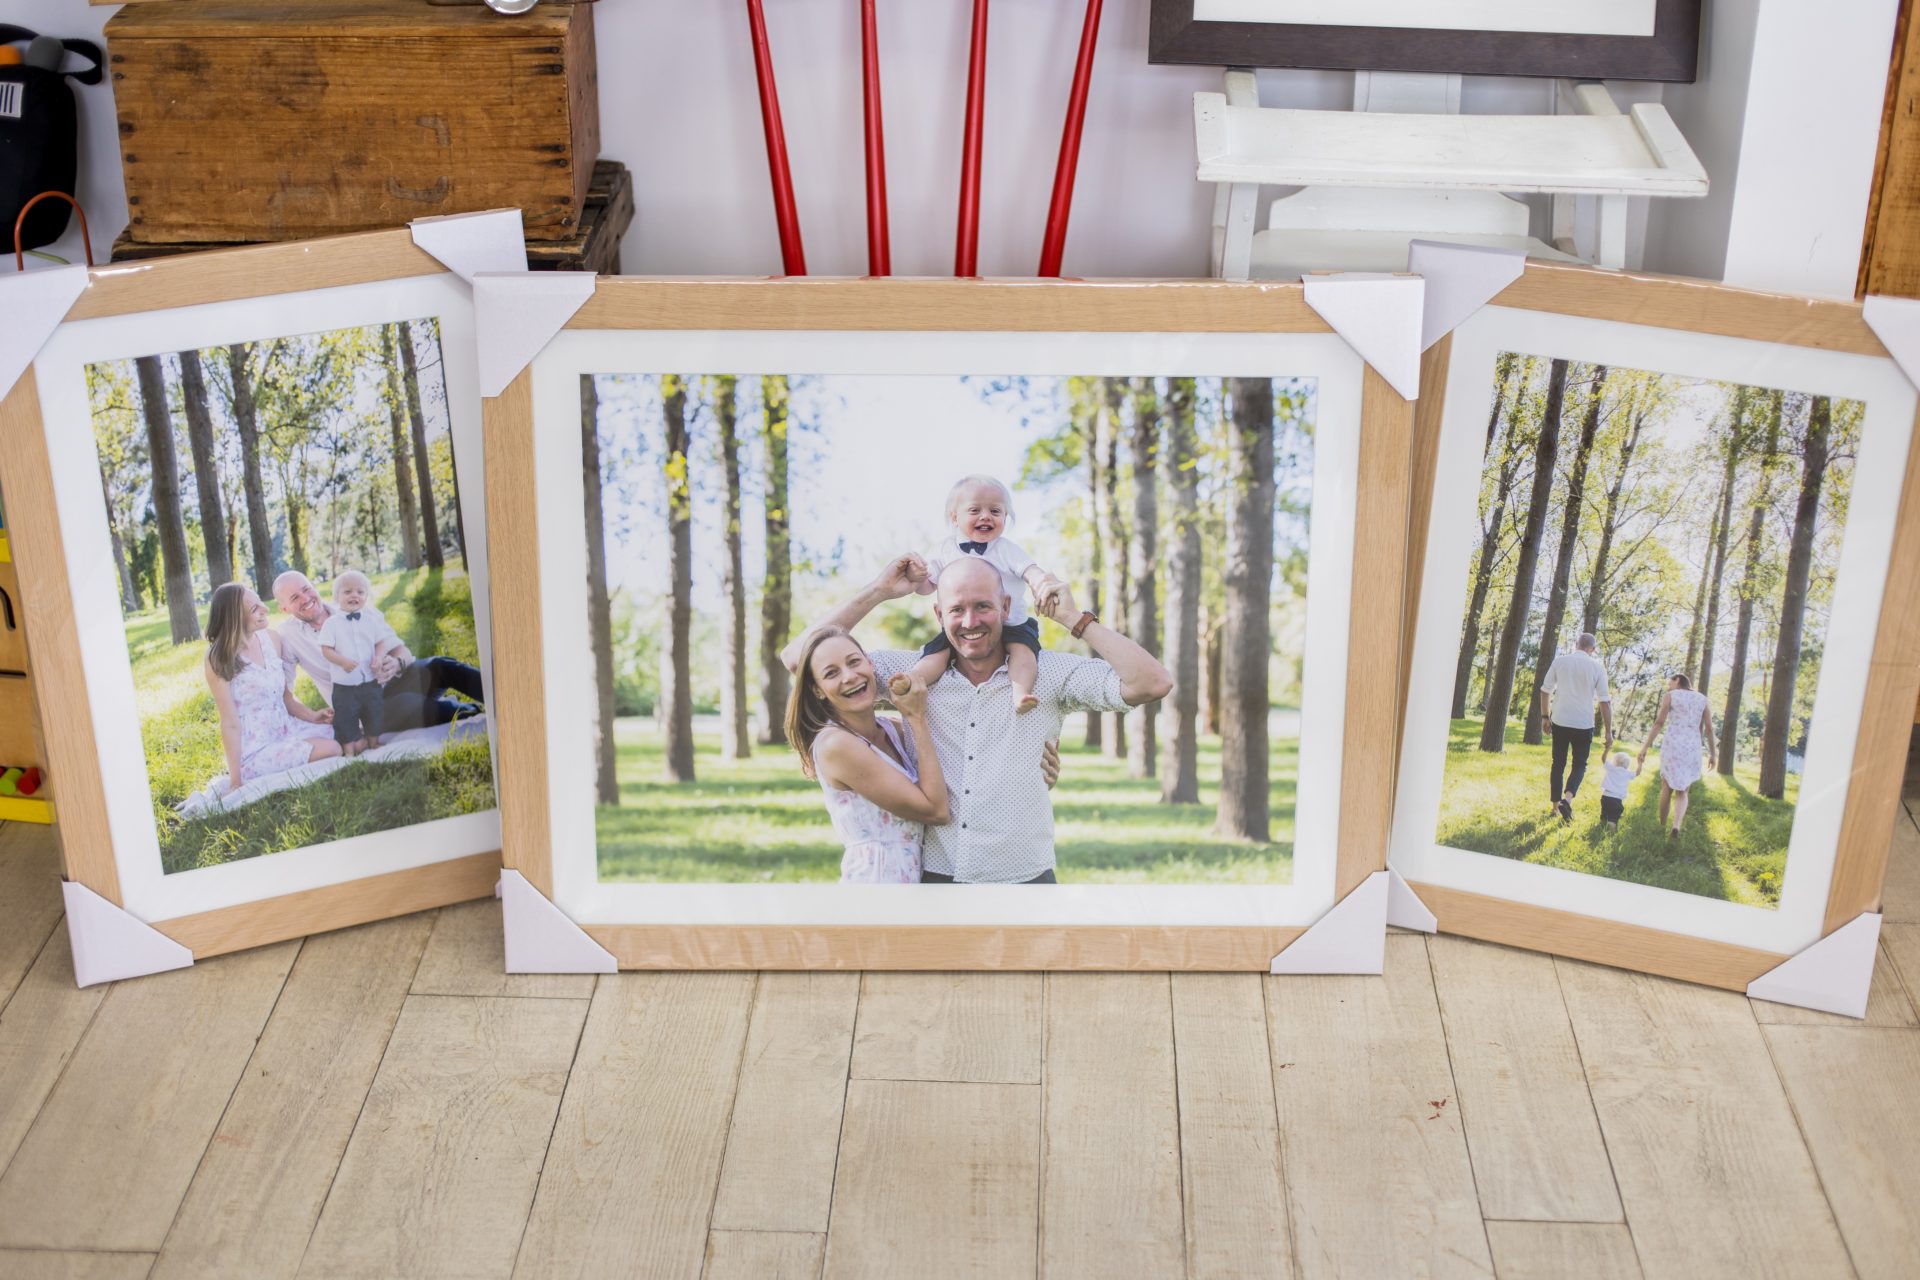
 Once your portraits are collected it is an exciting time to get your space ready so you can admire them on display in your own home. Or if you still are debating what to put up and where check out some ideas – 7 ways to display your photos.
Or these local framers can help you with custom framing requirements- Maitland Framing Gallery or Frame Today East Maitland.